The most useful measurement for a framed photograph is often the one people overlook: the outside of the frame. The image size tells you how large the printed photograph will be, but it does not tell you how much wall the finished object will occupy. A mount and a frame surround the image, adding width and height that can change how a print fits beside a door, above a shelf or between other pictures.
This guide offers a simple way to compare sizes before making an enquiry. It uses the gallery’s provisional dimensions as worked examples. They are a design model, not a confirmed manufacturing specification. Final measurements should be checked with the quote, particularly if the available space is tight or the frame must align with something already on the wall.
Separate the two measurements
Think of the photograph and the complete frame as two related rectangles. The inner rectangle is the printed image. The outer rectangle includes everything around it. In the sample gallery specification, a five-centimetre mount and a one-centimetre frame are added on each side. That means the total width and height each increase by twelve centimetres.
For example, a landscape image measuring 45 by 30 centimetres sits within an illustrative outer frame of 57 by 42 centimetres. The extra space is not an error or unused wall. It is part of the object’s composition, giving the photograph a boundary and a pause before the surrounding room begins.
Check that a size label refers to the measurement you expect. A listing that says only “medium” is not enough to plan placement. Useful product information should state both the image and outer dimensions, with units. The framing page and configuration summary keep those values together so you can return to them while comparing options.
Make a paper outline
Before choosing between two sizes, make an outline of each finished frame using paper. Mark the width and height carefully, then position the outline where you are considering hanging the picture. Use a temporary method suitable for your wall surface; if you are unsure about an adhesive, do not test it in a prominent place.
Step back and look from the places where you normally use the room. A position that looks balanced while standing directly in front of it may feel quite different from a sofa or a doorway. Notice nearby edges: the top of a sideboard, the corner of a window, a light switch or the start of another wall. They all influence the space around the picture.
The paper does not simulate the artwork, but it answers an important question reliably: can the object sit comfortably in this space? It is often more useful than a room mockup on a phone, where the size of the screen and an uncalibrated background can make almost any print appear to fit.
Consider the usual viewing distance
A photograph can be enjoyed from more than one distance. From across a room, you mainly see its larger shapes, colours and contrast. Up close, smaller details become important. When choosing a size, think about which of those experiences is most likely in the intended location.
A hallway may let someone approach the picture easily but offer little distance for viewing a very large image. A wall opposite a sofa provides distance, but small details may be harder to appreciate. Neither situation dictates a single correct size. It changes which photographs and proportions are worth comparing first.
You can test this with the image on your screen. View it at a smaller scale, then enlarge it, without assuming that the screen represents physical centimetres. Does the composition remain interesting when fine details disappear? If a particular detail is the reason you love the photograph, choose a location and print size that allow you to enjoy it rather than relying on the title to explain what is there.
Let the furniture help, without making a rule
Furniture gives a picture context. A wide sideboard creates a horizontal reference; a narrow console offers a different one. It can be helpful to compare the frame outline with these existing shapes, but a fixed ratio is not a substitute for looking at the whole room. A print can be smaller than the furniture below it and still feel intentional.
Consider everything that will share the space. A lamp, plant or stack of books may overlap the view from some angles. A group of existing pictures may create a rhythm that a new frame needs to join. Moving the outline a little can sometimes improve the arrangement more than increasing the print size.
Leave room to make the final placement decision with the actual frame present. Mount width, surface reflection and frame depth can affect how the finished object feels. The measurements narrow the choices; they do not replace a final look at the real object in the real room.
Compare shape and size separately
If you change shape and size at the same time, it can be difficult to understand which difference you prefer. Begin by comparing two sizes of the same crop. Then compare shapes, using the actual approved versions of the photograph. This keeps the decisions manageable and makes it easier to explain a preference in an enquiry.
In the sample catalogue, landscape images use a three-to-two ratio. Portrait images reverse that relationship, while square prints use equal sides. A square version may show a tighter part of a scene, so the subject itself can feel larger even when the outer frame is smaller. This is why two frames with similar dimensions may create quite different impressions.
If an image is unavailable in a particular shape, that is a useful constraint rather than a fault in the process. The photographer may have decided that the crop loses something important. Choose a compatible image or return to a shape that preserves the composition you wanted.
Keep a short measuring note
You do not need a detailed room plan to make a useful enquiry. A few measurements and a clear description of the space are usually a better starting point than a long list of uncertain preferences. Record the maximum available width and height, the approximate viewing distance, and anything the frame needs to align with or avoid.
If you are choosing a gift and cannot measure the recipient’s wall, be honest about that uncertainty. A smaller, flexible size may be easier to place, but it is still worth considering the recipient’s existing pictures and available surfaces. You can explain that it is a gift and ask what needs to be confirmed before an order is agreed.
Use the size step to compare the provisional options. Your selection can be changed before you send an enquiry. The goal is not to find a universally perfect size; it is to make a considered choice using the actual dimensions, the photograph and the room in which you will enjoy it.
Specification note
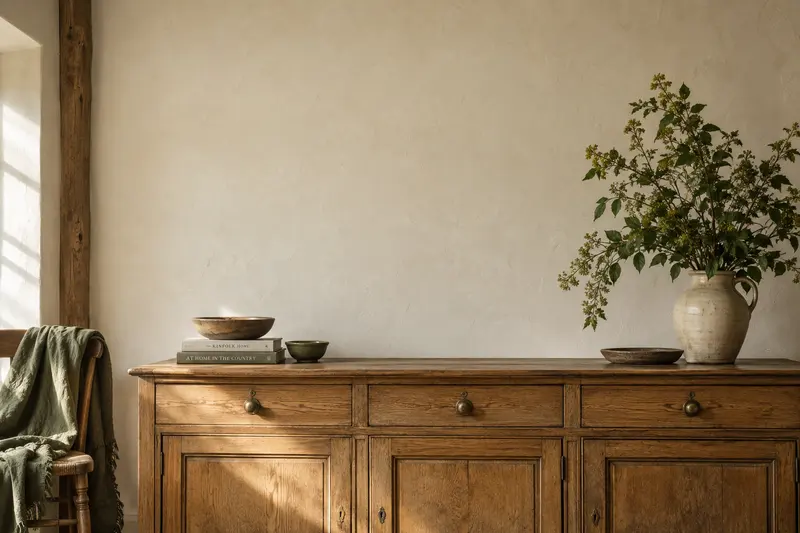
This guide’s numerical examples come from the gallery’s sample size matrix. Confirm them against the actual print, mount, frame profile and supplier tolerances before agreeing an order. The room illustration is generated and not calibrated to physical scale. It demonstrates a visual direction, not a measured installation. See the image credits and framing guide for the relevant context. For a worked furniture layout, see choosing art above a sofa.
A place for your wall.
Explore the collection, then choose a size and finish at your own pace.